Wednesday, September 23, 2015

Calendar Integration with Google Classroom

Google Calendar is now integrated with Google Classroom.  


If you go to classroom.google.com and click on the three horizontal lines, you should see 
Calendar as an option.

You can also get to it by going to the About part of your Classroom.


It will be listed towards the bottom.  If you have not recently created an announcement or assignment, the Calendar will not automatically be connected to your Google Calendar account.  Once you do this, you can click on the link to open your Classroom calendar in your Google Calendar.


Now students, and teachers, can see when all of their assignments and questions are due.  This should easily help with workflow.

You can follow the steps listed on the support, site https://support.google.com/edu/classroom/answer/6272985, or watch the video to get more info.  If you do not see it now, it should be there very soon.


Tuesday, September 15, 2015

Use Video To Reflect On Your Teaching

I remember as a student teacher at ISU that I had to record myself teaching using an audio recorder.  The purpose of this was so that I could go back and listen to myself teach so that I could analyze what I heard and reflect in order to improve.  This is an important procedure that we should always be doing, reflecting and growing as an educator by analyzing our current state.


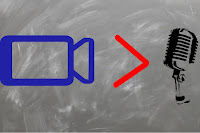
My issue is that audio does not give you enough information in order to really analyze what is happening in the classroom.  While listening to yourself speak can tell you something, you are missing out on a lot of other factors that are happening in the learning environment.  You are not looking at how you physically interact with students as well as what the students are doing.  The students are the primary learners and we should be focused on what they are doing, not just what the teacher is doing.  We can get a clear picture about what is really happening in the classroom by using some video recording tools.  The more that we can observe, the more we can reflect on and improve upon.

Part 1: Record the teacher

  • There are many ways you can record yourself while in the classroom but luckily we have the ideal tool for this, the Swivl.  A Swivl is like a robotic cameraman that will swivel around (hence the name) and point the iPad, or other device, at you while you are in the classroom.  The person being recorded wears a microphone and the Swivl uses infrared light to track the motion of the person.  This records video of the teacher so we can see what they are doing and hear what they are saying.
  • There are other ways to do this without the Swivl such as setting up a camera, or using a smarthphone or tablet, in the back of the room or on the side, but getting audio can be the tricky part.  If you move the device closer to the teacher, you get better audio but if the teacher wanders around the room, you may not see or then hear them.
Part 2:  Record the class
  • Now that we can see, and hear, what the teacher is doing, we need to turn our focus to the students.  For this part you can easily just place any recording device in the back of the room (smartphone, tablet, video camera, digital photo camera with video mode, laptop) and hit record.  Another option that I think may record more, due to the lense that it uses, is a GoPro.  GoPros can have a lot of uses but they are small and record using a wider angle than other cameras.  This allows you to see more of the classroom from any recording location.  Just make sure that you can see what your students are doing while you are teaching.
Part 3: Analyze and Reflect
  • Now that you have your videos, you can watch them to get an idea about how well the lesson went and what you can work on.  This is something you can do alone but having another person with you can help you better analyze the situation.  They may be able to see things that you don't or they may just be able to ask questions to better clarify what you are seeing.  (If you have instructional coaches, these would be very helpful at this point.)
  • Compare the videos side-by-side.  You can do this by simply opening the videos and hitting play at the same time or you can use something, like iMovie, to combine the videos so you have one to watch.
  • Focus on what the students are doing and record any observations that may help you;
    • How engaged are the students?
    • Does proximity to you affect their behavior?
    • How much talking do they do versus how much time you are talking?
    • Who is asking the questions and who is participating, are others given other ways they can be engaged?
    • How much time is spent as a passive learner versus an active learner?
  • Share with others if you want more assistance or just save the videos so you can compare them to future ones.  Set a goal you want to work on and determine a timeline before you record again.  Focus on how you can improve your awareness of any issues you found and have some steps on how to improve them while also identifying any resources (tools, research, people) you may need to hep you be successful.
Professional athletes use video and coaches all the time to improve, no matter how great of a player they are.  We, as educators, can do the same in order to improve as our outcomes are more important than just winning a game - improving student learning.


Tuesday, September 8, 2015

My Top 3 Curation Tools

To be an effective learner today, you need to know how to curate resources.  There is a tremendous amount of information out there and if you do not curate your resources, selecting those that are relevant and useful, you will be overwhelmed by what you find.  There are a lot of curation tools out there that allow you to do this easily, but there are three that I find myself using more than others, but for different purposes.

Flipboard to share with others

  • Flipboard is my curation tool of choice when I want to curate general resources to share with others.  I have multiple magazines that each have their own topic, as well as other magazines which are focused on resources from various conferences I attend.  Flipboard looks the best of the three I use and has dedicated web and mobile apps.  As with all of my curation tools, make sure you install the Chrome extension so you can easily add to your collection.  Flipboard also can be used with others as co-curators so this can be a collaborative effort.
Pocket to share with myself
  • Pocket is my app of choice when I am curating just for myself.  This is usually related to specific information I am looking for based on my current needs.  I quickly add to my Pocket resources and then go back to them later on my phone or tablet.  Again, the Chrome extension makes this easy to curate and the app makes it easy to get back to it.  It does not have the same looks as Flipboard and does lack the collaboration aspect which is easy to get with others.  It works great though when I am focused on curating a specific set of info.
Padlet to share during presentations
  • Whenever I am giving a presentation or working with teachers from another school, I make a Padlet wall to curate resources related to our topics.  I also make it so they can add their own resources to share with others.  This is a benefit to Padlet as you can easily make it so people can add to a Padlet without them being able to remove or edit other entries.  You can easily link to the Padlet or embed it on a Google Site.  Installing the Chrome extension should be the first thing you do.  Padlet looks great and can automatically sort into a grid pattern based on the entries.  
It doesn't matter what tools you use as long as you are organized and can curate resources instead of just collecting them or forgetting them.  You don't have to use different tools for the different purposes but I have found it helps me to better organize what the purpose of that resource is before I curate it.  If you are sharing your curations with others, make sure you look to those that are easy to share and look pleasing to others.  

You can watch the video below to see my three curation tools in action and search my sites for other resources related to these tools.


Friday, September 4, 2015

September Ed Tech Challenge

As a fun way to introduce some more collaboration, sharing, and a challenge, we are introducing Ed Tech Challenges for our staff each month.  This first month is just get teachers introduced to the idea and get them sharing out what new things they are trying out in the classroom, or to help them get ideas about what else they could be trying.  This is my way of working towards some of the 4C's (collaboration, creation, critical thinking, and communication).


There are various challenges that can earn teachers points and I will keep track of them using a Padlet wall or by watching the #ameshighpride hashtag on Twitter.  The Padlet wall is also an easy way for teachers to share what they are doing so other teachers can see it.  While the reward to the winner is some homemade treats, made by my wife or me depending on what they choose, the real reward will come in the collaboration they experience and the ideas they can get from working with each other.  My hope is to have a theme each month to help us focus on our growth areas and to keep the learning going.  

Thursday, September 3, 2015

Awesome Updates to Google Apps

Google just released some new updates to various Google Apps that will be some nice improvements for use in the classroom.  You can find their post about the updates at http://googleappsupdates.blogspot.com/2015/09/do-your-best-work-with-google-docs.html but I wanted to go over the top updates for the classroom.

1.  Voice to Text in Google Docs

  • While there have been some Chrome extensions that offered voice to text features, having it built in to all Google Docs on the web or through an app makes it much easier to use.  Voice to text can be really useful as an assistive tool for students who have issues when it comes to writing but can explain their ideas more effectively.  This is also useful to help students record their thoughts or to help them get started writing out something that may be a bit more complex.  You can quickly find the Voice tools under the "Tools" tab.


2.  Templates
  • Google has finally made templates available in various Google Apps.  By clicking on the Home button in Docs, Sheets, or Slides; you can create a new doc using any of the various templates provided.  A lot of these will be really useful to students as they prepare reports, resumes, or other types of docs where a template helps to organize it.


3.  Explore tools in Sheets
  • Google has also made it much easier to "see" your data in a Google Sheet using the Explore tools.  This tool will quickly create graphs and charts based on the data in your sheet.  This could make it much easier for both students and teachers to be able to make sense of and use data to make informed decisions or conclusions.


4.  New Google Forms
  • Google has also updated Google Forms with a new layout and tools.  You have to "opt-in" right now to get access to the new Forms but you can still leave them to get back to the old Forms.  Go here to opt-in to the new Forms.  Mostly, they layout while editing the Forms looks more up-to-date and will be easier to use for people new to Forms.  Others, who have used Forms extensively, will of course have to take some time to get used to the new layout.  The looks are not the only things to change as you have new customization options and the results will now appear in the same page as the Form editing.  


There are some other updates to Google Apps included in this but you can find out about all of them by clicking the link above to get to Google's blog post.  You can also watch the video below to see some of the updates in action.


Tuesday, September 1, 2015

What To Do If The Turn In Button Is Missing In Classroom (For Students)

Occassionaly there will be a little glitch with assignments created in Classroom where the "Turn-in" button is not showing up in a Google Doc (or other Google App file) for students to submit from the file.  When this happens, all they have to do is to add the file as an attachment to turn it in.  Watch the video below to see how this is done.